【iOS】Table Viewを使ってみる
前回の続き。
今回はTable Viewを表示する所をやってみる。
予め2ページ目の中央に配置していたLabelは削除しておく。
story boardでObject LibraryからTable Viewを探してページに置く。

続けてTable View Cellを探し、先程配置したTable Viewの上に置く。

ここで2ページ目を表示するためのView Controllerを作成する。
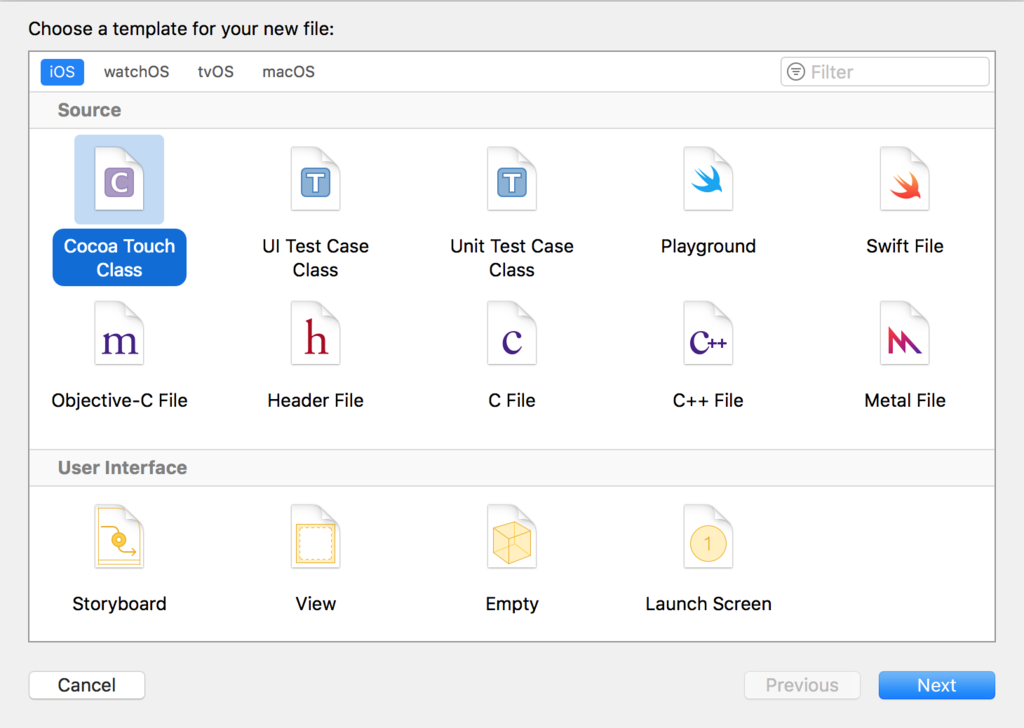
プロジェクトツリーで右クリック -> New File..を選択。
以下の画面でCocoa Touch Classを選択する。
クラス名にSecondPageViewControllerと入力し、
Subclass of にはUIViewControllerを選択する。
※Table Viewだけのページであれば、UITableViewControllerでも良さそう。

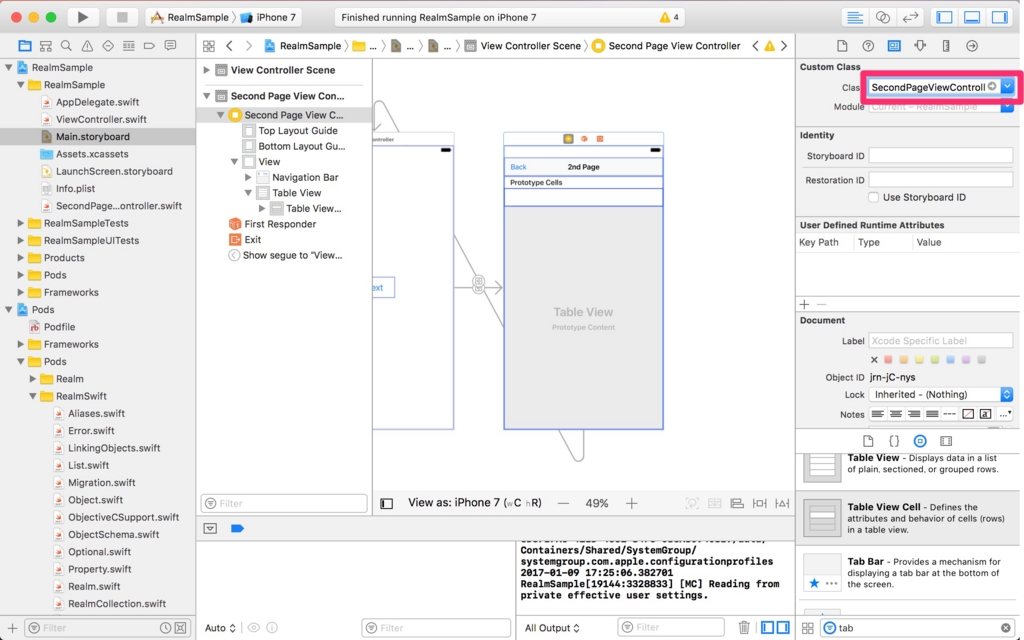
Storty Boardに戻り、2ページ目のView ControllerのAttribute Inspectorの設定で、classに先程作成したSecondPageViewControllerを指定する。
Assistant Editor(∞みたいなアイコン)を開くと、左側にStory Board 右側にSecondPageViewControllerが表示される。
※表示されなければ表示されるように調整する。
この状態で、Table ViewからCtrlキーを押しながらSecondPageViewControllerのクラス定義の直下にドラッグする。
↓画像のようなダイアログが出るので、tableViewという名前で設定する。

そうすると、@IBOutletでStory BoardのUITableViewとSecondPageViewControllerのUITableViewがtableViewという変数名で接続され、以下のようにコードが挿入される。
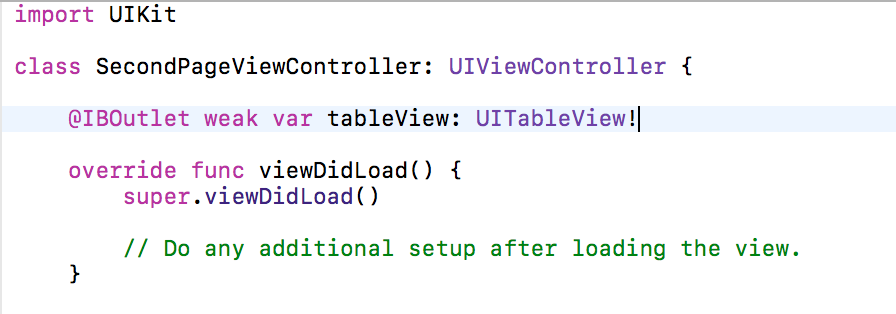
その後、クラス定義部分にUITableViewDelegateとUITableViewDataSourceを追加して以下のように書き換える。
class SecondPageViewController: UIViewController, UITableViewDelegate, UITableViewDataSource {
Story Boardに戻って、tableViewのConnection Inspectorを開く。
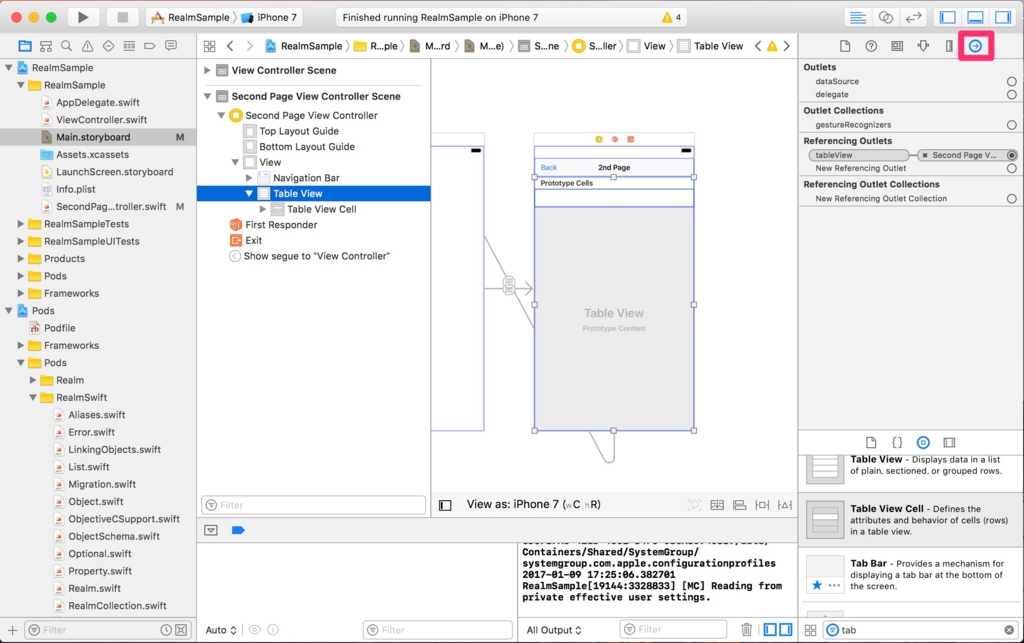
dataSourceとdelegateからSecondPageViewControllerに向かってドラッグする。

そうすると、dataSourceとdelegateがSecondPageViewControllerに接続される。
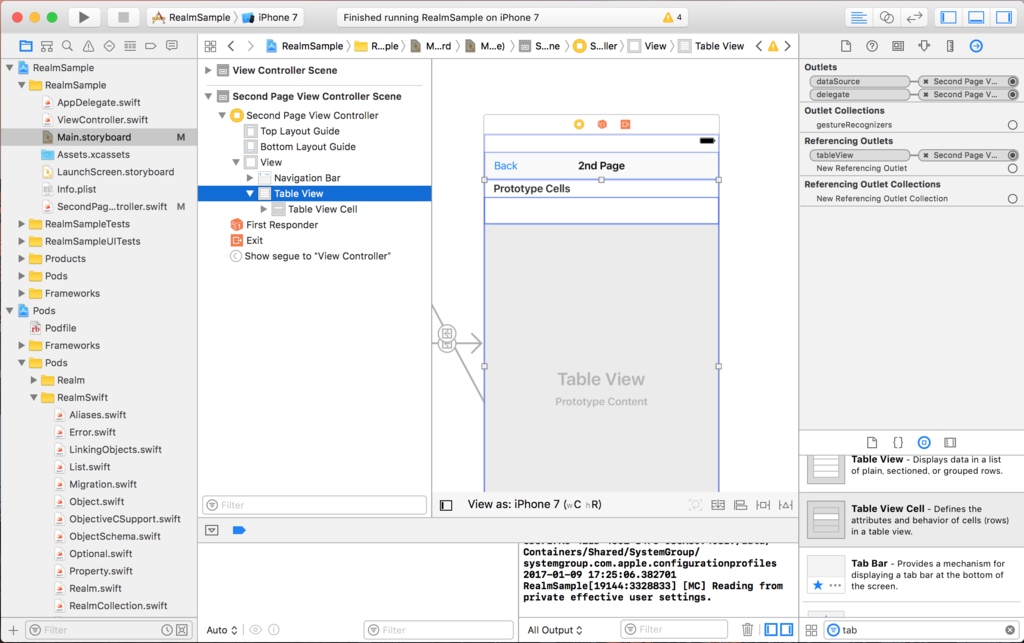
ここでdataSourceとdelegateを実装していないのでコンパイルエラーが出るけど、先にCellの定義を追加する。
新たにCocoa Touch Class作成画面を開く。
クラス名にSecondPageTableViewCellを指定し、
Subclass of: にUITableViewCellを指定する。

Story BoardでTableViewCellのIdentity Inspectorを開き、classにSecondPageTableViewCellを指定する。
ついでにCellで画面表示したい項目をLabelで配置しておく。
画像の例だと、Labelでidとnameを配置している。

同様にAttributes Inspectorを開き、IdentifierにSecondPageCellを指定する。
※この項目は後ほどコード上でCellを取得するために使われる。

Assistant Editorで左にStory Board 右にSecondPageTableViewCellを開いて、
Story BoardのCellからid項目とname項目をCtrlキーを押しながらドラッグして、SecondPageTableViewCellに接続する。

更に、データセット用のメソッドを定義する。
    func setUserData(id: String!, name: String!) {
        self.id.text = id
        self.name.text = name
    }
最終的には以下のようなクラスになっている。
import UIKit

class SecondPageTableViewCell: UITableViewCell {

    @IBOutlet weak var id: UILabel!
    @IBOutlet weak var name: UILabel!

    func setUserData(id: String!, name: String!) {
        self.id.text = id
        self.name.text = name
    }

    override func awakeFromNib() {
        super.awakeFromNib()
        // Initialization code
    }

    override func setSelected(_ selected: Bool, animated: Bool) {
        super.setSelected(selected, animated: animated)

        // Configure the view for the selected state
    }

}
SecondPageViewControllerに戻って、TableViewの実装を行う。
まずはtableViewが何行あるかを表示するための以下のメソッドを実装する。
今回は練習なので単純に5をreturnする。
    func tableView(_ tableView: UITableView, numberOfRowsInSection section: Int) -> Int {
        return 5
    }
さらに、対象行のCellを取得するためのメソッドを定義する。
withIdentifierに設定する項目は、Attributes InspectorでIdentifierに設定した値に合わせる必要がある。
今回の場合は、SecondPageCellになる。
また、型はSecondPageTableViewCellを指定する。
最後にsetUserDataでCellにセットする項目を入れる。
※今回の場合、現在の行のindexというidと"hoge"という名前がセットされる。
    func tableView(_ tableView: UITableView, cellForRowAt indexPath: IndexPath) -> UITableViewCell {
        let cell = tableView.dequeueReusableCell(withIdentifier: "SecondPageCell", for: indexPath) as! SecondPageTableViewCell
        cell.setUserData(id: String(indexPath.row), name: "hoge")
        return cell
    }
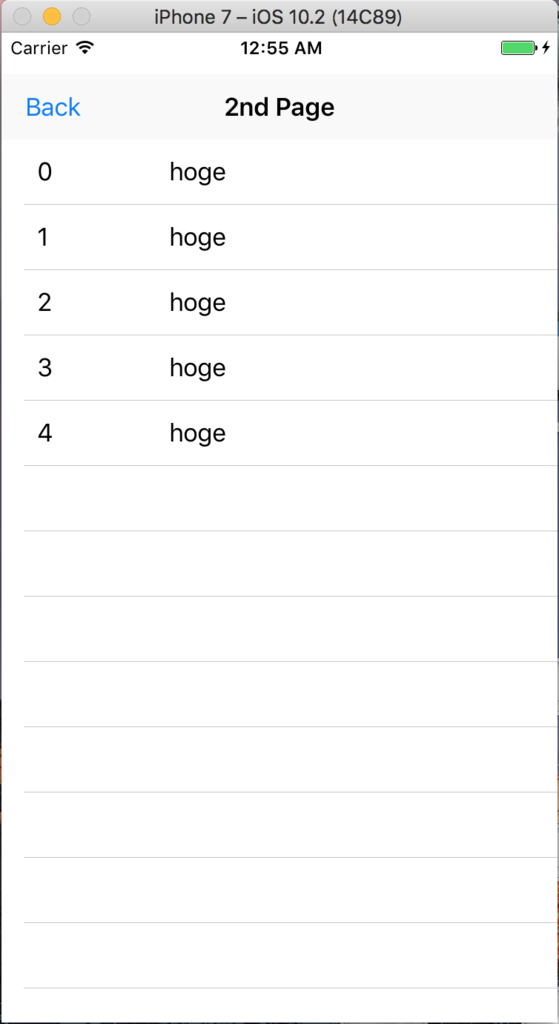
この状態でビルドして実行すると、以下の画面のようにTable Viewを表示することができた。
ここまで進めてきて徐々に難しくなってきた反面、楽しくなってきたので引き続きiOSアプリ開発方法を学んでいきたい。
Swiftのコード実装も増えてくるといい感じ。